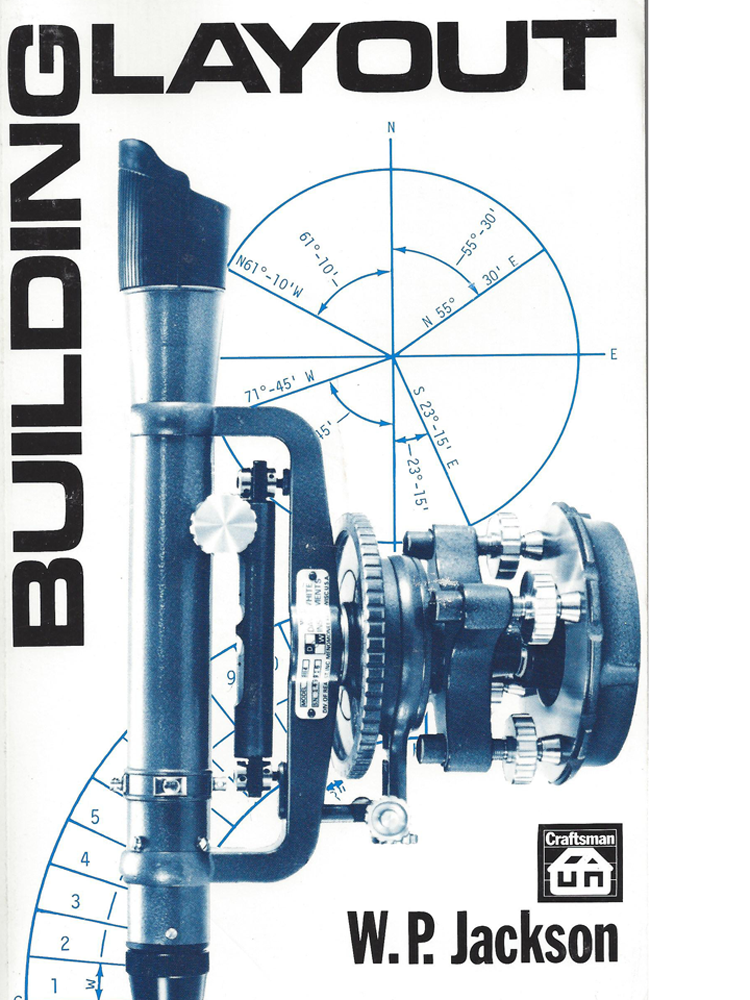


Building Layout
Shows how to use a transit to locate a building correctly on the lot, plan proper grades with minimum excavation, find utility lines and easements, establish correct elevations, lay out accurate foundations, and set correct floor heights.
Explains how to plan sewer connections, level a foundation that's out of level, use a story pole and batterboards, work on steep sites, and minimize excavation costs. ISBN 0-9104460-69-8
Shows how to use a transit to locate a building correctly on the lot, plan proper grades with minimum excavation, find utility lines and easements, establish correct elevations, lay out accurate foundations, and set correct floor heights.
Explains how to plan sewer connections, level a foundation that's out of level, use a story pole and batterboards, work on steep sites, and minimize excavation costs.
| Weight | 1.000000 |
|---|---|
| ISBN | 0-9104460-69-8 |
| Page Count | 240 |
| Author | W.P. Jackson |
| Publisher | Craftsman Book Company |
| Dimensions | 5-1/2 x 8-1/2 |
-
1. The Transit, 5
-
Level Tube Sensitivity, 12
- Setting Up The Transit, 14
- 2. Reading Survey Maps, 19
-
Metes and Bounds, 21
- Bearings of Property Lines, 26
- Converting Bearings to Azimuths, 28
- Curves and How To Understand Them, 30
- Converting Bearings to Interior Angles, 33
- Bearings of Property Lines, 26
- 3. Locating The Building On The Lot, 43
- Information From Plot Plans, 52
- 4. How To Take Elevations, 57
-
The Builder's Levels, 60
- Taking Elevations, 63
- Conversion Charts, 71
- Taking Elevations, 63
- 5. Establishing Grades, 75
-
Establishing The Correct Floor Elevation, 78
- Driveway Grades, 88
- Aligning Floors In New Additions, 91
- Driveway Grades, 88
- 6. Calculating Cuts And Fills, 97
- Calculating Excavation Quantities, 101
- 7. Foundation Layouts, 109
-
Taking Horizontal Measurements On Steep Slopes, 110
- Mathematics For Foundation Layouts, 123
- Diagonals and Accurate Foundation Layouts, 123
- Laying Out The Foundation, 128
- Mathematics For Foundation Layouts, 123
- 8. Calculating Elevations For Footers And Forms, 139
- Stepped Footers, 149
- Estimating Footer Costs, 157
- 9. Foundation Construction And Leveling, 163
-
The Masonry Contractor’s Checklist, 165
- Leveling The Foundation Wall, 167
- Estimating Foundations Costs, 177
- Leveling The Foundation Wall, 167
- 10. Circular Stair Layout, 179
- Building Circular Stairs, 191
- 11. Other Layout Problems, 205
-
Curved Room Corners, 205
- Round Patios, 210
- Pentagonals, 213
- Hexagonal Patios, 220
- Octagonal Patios, 227
- Round Patios, 210
Chapter 1
The Transit
A transit is used to measure horizontal and vertical angles. An engineer normally measures angles from the north-south meridian in surveying, so the engineer's transit is equipped with a compass. The builder's or contractor's transit, or transit-level, does not normally include a compass because buildings are laid out from an existing fixed point at or near the building site, such as the lot corner stake or monument.
A theodolite is essentially a more precise transit. Instead of a vernier scale, a theodolite is equipped with an optical micrometer scale. This permits readings that are not possible on a vernier, such as readings directly to 10" (0º 00' 10"). On some models the readings are directly to one second (0º 00' 01"). Figure 7-15 shows the accuracy of these readings. The theodolite has an optical plummet, and the sensitivity of the level tube is usually 45", or better. Theodolites are used where precision work is essential.
The operation of a builder's transit (or transit-level) is not complicated. You don't need an engineering degree or any technical knowledge to use one. More and more trades are using them to save time, cut costs, and insure accuracy in their work.
- Builders need them to lay out foundations, plot lot lines, establish grades and excavations, and for many other uses.
- Plumbers need them to lay out sewer lines.
- Masons need them to level walls and foundations.
- Concrete contractors need them for grades on floors, driveways and walks.
- The list can include farmers, landscapers and many others.
There are three main parts to any transit – the telescope, the leveling vial, and the circle.
1. The telescope This is a precision optical sighting device that produces a clear magnified image. The degree of magnification of a telescope is called its power (x). For example, a 20x telescope makes a distant object appear 20 times closer than if viewed with the naked eye. Crosshairs in the telescope permit the object sighted to be centered in the field of view. See Figure 1-1. The power of the telescope can vary. The less expensive instruments have a lower power and are used for shorter range. An 18x instrument is usually used in work up to about 120 feet. A 26x instrument may be used for work up to 500 feet. Telescopes come in one of two types: fixed lens or zoom lens, sometimes called variable power type. The fixed lens type has a fixed power, such as 18x or 26x. The variable powers of the zoom lens type depend on the model of the instrument; some adjust from 18x to 34x, others from 24x to 37x. The advantage of the zoom lens is that it compensates for dim light and changes in distance.
2. The leveling vial This is a bubble that works like the bubble on a carpenter's level, but it is much more sensitive and accurate. Leveling vials are available in various degrees of sensitivity. For precision work use a more sensitive vial. A level vial with a sensitivity of 90 seconds ( " ) per 2 mm is more sensitive than one whose sensitivity is 14 minutes ( ' ) per 2 mm. A vial with a sensitivity of 45 seconds ( " ) per 2 mm is more sensitive than one with a 90 seconds ( " ) per 2 mm sensitivity. Level tube sensitivity is explained later in the chapter.
3. The circle This is the plate on which the telescope rotates. It is marked in degrees and has a vernier scale that subdivides each degree in minutes on the better models. Instruments designed for still greater precision have a vernier that further subdivides each minute into seconds. Figure 7-15 shows what different vernier readings mean in linear distance. Thus, a transit whose vernier reads to 15 minutes can have a linear error of 5 ¼" in 100 feet. One whose vernier reads to 5 minutes can have a linear error of 1 ¾" in 100 feet. But the instrument with a vernier reading of 20 seconds may have a linear error of only 1/8" in 100 feet. The theodolite is recommended for work that requires greater precision than an instrument with a 20 second vernier reading. See Figures 1-2 and 1-3. These are extremely precise instruments.
The optical plummet is a device for centering a transit over a point. It replaces the plumb bob used in most transits. By sighting horizontally through a right angle prism, you see the point over which the transit is centered. When the instrument is properly set up it is directly over the mark. The optical plummet serves the same purpose as a plumb bob, but is more accurate because it is not affected by the wind.
Purchase the most precise transit you can afford. You may not need that degree of precision now, but you probably will need it later when your skills increase and you take on other types of jobs. Since you use a transit for its accuracy, there is no substitute for an accurate instrument regardless of the size of the job.
Figure 1-2 shows a transit with a 20 second vernier reading. The divisions on the circle and vernier are very fine. It takes practice to read a vernier with this precision. The circle and vernier in this illustration read 8º 29' 40".
Figure 1-3 shows two theodolites, each with a micrometer scale. The T-308AT theodolite reads directly to 20 seconds on the optical micrometer. Its horizontal (H) reading in the illustration is 285º 56' 20". The vertical (V) reading is 169º 36' 20". The T-208AT theodolite reads directly to 10 seconds on the optical micrometer. The horizontal reading shown is 268º 45' 50". The vertical reading on the T-208AT is 152º 25' 50". As shown in the illustration, both horizontal (H) and vertical (V) circles are viewed simultaneously. This helps you make error-free readings.
The right transit for you depends on your job requirements. The range of the work and the accuracy required are two factors you must consider before selecting any instrument. Be sure the transit you select has the power, the precision, and the versatility you need to meet all your requirements for the present and the future.
Level Tube Sensitivity
The more sensitive the level tube, the greater the precision that may be obtained. A 75 second (") per 2 mm level tube is approximately 60% more accurate than one with a sensitivity of 120 seconds per 2 mm.
Level tubes are ground to specific radii. If the radius is large, a small vertical movement on one end of the tube causes a large displacement of the bubble. If the radius is small, the same vertical movement causes only a small displacement of the bubble. Thus the radius of the tube is a measure of its sensitivity. The more sensitive the level tube, the longer it takes to center the bubble. A bubble that travels more with small movement takes longer to settle with each movement of the leveling screw. When the bubble moves even slightly on any transit, you will see a movement in the line of sight as indicated by the crosshairs in the field of vision.
Table 1-4 shows the radii of level tubes of different sensitivities. The greater the precision of the transit, the more sensitive is the level tube built into it. An instrument whose vernier only reads to 15 minutes would probably have a level tube with a sensitivity of 8 to 14 minutes (or 480"-840") per 2 mm. An instrument with a 5 minute vernier reading would probably have a level tube whose sensitivity would be from 90 to 120 seconds per 2 mm, and an instrument with a 1 minute vernier reading would probably be in the 60 to 75 seconds per 2 mm sensitivity range.
| Sensitivity in seconds ( " ) per 2mm division of level tube | Radius of curvature in feet |
| 14' (840") | 1'-7" |
| 8' (480") | 2'-10" |
| 100" | 13'-6" |
| 90" | 15' |
| 75" | 18' |
| 60" | 23' |
| 45" | 30' |
| 30" | 45' |
| 20" | 68' |
|
Radii of Level Tubes
of Different Sensitivities |
|
The more precise instruments whose vernier or optical micrometer scales read in the seconds would have level tubes in the 20 to 45 seconds sensitivity range.
Level tube sensitivity is normally given as the number of seconds of arc per 2 mm division on the tube. In most units, the markings on the level tubes are 2 mm apart. This means that for each 2 mm the bubble moves in the tube, it forms an angle equal to the sensitivity of the arc given. So a level tube with a sensitivity of 45 seconds per 2 mm would form an angle of 45 seconds at a radius of 30 feet for each 2mm division the bubble moves in the tube. A level tube with a sensitivity of 90 seconds per 2 mm would form an angle of 90 seconds at a radius of 15 feet for each 2 mm the bubble in the tube moves. See Figure 1-5. A tube with a sensitivity reading of 8 minutes (480 seconds) would form an angle of 08' 00" at a radius of 2 feet 10 inches (2'-10") with each 2 mm movement of the bubble.
Setting Up The Transit
The transit is designed to produce precision work. But if it is not set up and leveled properly, accurate work is impossible regardless of how accurate the instrument is. Make sure your instrument is in perfect adjustment before you follow the instructions below.
The transit is usually set up over a fixed point such as a tack in a stake, an iron pin or a crossmark in a concrete monument. The manual that comes with each transit gives step by step instructions for setting up and leveling the instrument. They will not be covered here, but you should know the reason for some of the operations and how they can affect the accuracy of your work.
Set the tripod on firm ground and make sure the tripod points are stuck well into the ground. If you are setting up on a paved surface, be sure the points are secure. Position the tripod legs so the center of the tripod head is approximately over the centering point and the tripod head appears level. If the center of the tripod head is not approximately over the point, centering the transit with the plumb bob or optical plummet isn't possible. You must then reposition the tripod. If the tripod head is too far out of level, the transit can not be leveled with the leveling screws.
Leveling is the most important operation you perform before you use your instrument. The accuracy in all readings and surveying tasks requires a level instrument at all times. Figure 1-6 shows a serious error due to an instrument out of level. Points A, B, and C have been located. The instrument is set up over A to locate D. The line of collimation (the line of sight when the telescope is at 0º elevation) is perpendicular to the vertical axis. See Detail 1, Figure 1-6. The instrument is set up over A, centered over the tack and properly leveled. A 90º angle is turned from B, and D is located at the proper distance from A. But after setting up at A, say the instrument is not level. See Detail 1, Figure 1-6. The vertical axis is not centered over A, even though the plumb bob might be. Instead it will be centered over another point, a, resulting in an erroneous reading. This gives d instead of D. As a result, the angles AdC and BCd are not 90º and the distance from C to d differs from that of B to A when they should be the same.
Using a transit with an optical plummet provides a faster and more accurate method of centering than the plumb bob. The wind has no effect on the optical plummet; it can be a factor with the plumb bob. Figure 1-7 shows the principle of the optical plummet. Line a-b is parallel to the line of collimation of the telescope and is perpendicular to b-c, which is the ray of light from the right angle prism at b to the target at c. Therefore, if the instrument is level when it is set up and centered at point A as shown in Figure 1-6, sighting through the optical plummet a-b will center the tack at A. If the instrument is not level, as shown in Detail 2, Figure 1-6, the optical plummet will not be centered over A throughout a complete 360º revolution. It will be centered on different points such as a when the telescope is revolved. If this condition exists, recheck the instrument for level and do not proceed with any readings until the optical plummet is centered over the reference point throughout the entire 360º.
Building Layout
by W.P. Jackson
There is no substitute for accurate layout of foundations, walls and floors. Yet few builders know how to use a transit to locate the building on the lot correctly, plan proper grades with minimum excavation, find utility lines and easements, establish correct elevations, lay out an accurate foundation, set correct floor elevations and plan stairways. This practical handbook explains these valuable skills and shows builders and tradesmen how to use the builder's level, plot plans, lot descriptions and surveying principles to be sure the building is in the right location and is built square, level and plumb. Hundreds of valuable suggestions are included: planning sewer connections, leveling a foundation out of level, using a story pole and batter boards, working on steep sites, minimizing excavation costs and much more.
About the Author
W.P. Jackson has over 30 years of experience as a builder and developer of quality and luxury homes, subdivisions and garden apartments. He is active in local government, is currently serving on the planning commission in his community and is a consultant on construction operations. This book is the result of his interest in improving professional standards among builders.